If you're using Windows 10, you can turn your laptop into a wireless hotspot with just a few clicks as long as you have the Windows 10 Anniversary Update.
MacOS computers can share their hardwired internet as a Wi-Fi hotspot a well with built-in tools. If you're using Windows 7 or 8, a free program called Virtual Router can allow you to create a wireless hotspot.
Three Methods To Create a Free Virtual Wifi Hotspot on Your Laptop
Method One : Using Windows 10 Edit:
10 Steps Create a Free Virtual Wifi Hotspot on Your Laptop Using Windows 10 Edit

Step 1: Check your Windows 10 version. The Windows 10 Anniversary Update (version 1607) introduced the ability to easily turn your Windows 10 computer into a wireless hotspot without any additional software or command prompts.
Click the Start button or press ⊞ Win. Type winver and press ↵ Enter. Check the "Version" entry. It should be "1607" or later.
Step 2: Install the Windows 10 Anniversary Update if under version 1607. This update is free, but may take half an hour to an hour to completely install.
Visit the Windows 10 Anniversary Update page and click the "Get the Anniversary Update now" button. Follow the prompts to download and install the update.
Step 3: Tap or click the Start button. Once the Anniversary Update is installed, you can access the wireless hotspot settings from the Start menu. If you're not careful, you may accidentally open the Search menu instead, which will lead to the wrong Settings menu. Make sure you're tapping or clicking the Start button in the lower-left corner of the screen.
Step 4: Tap or click the "Settings" option. This can be found on the left side of the Start menu. The button may be just a a gear icon.
Step 5: Tap or click "Network & Internet." Your network settings will be displayed.
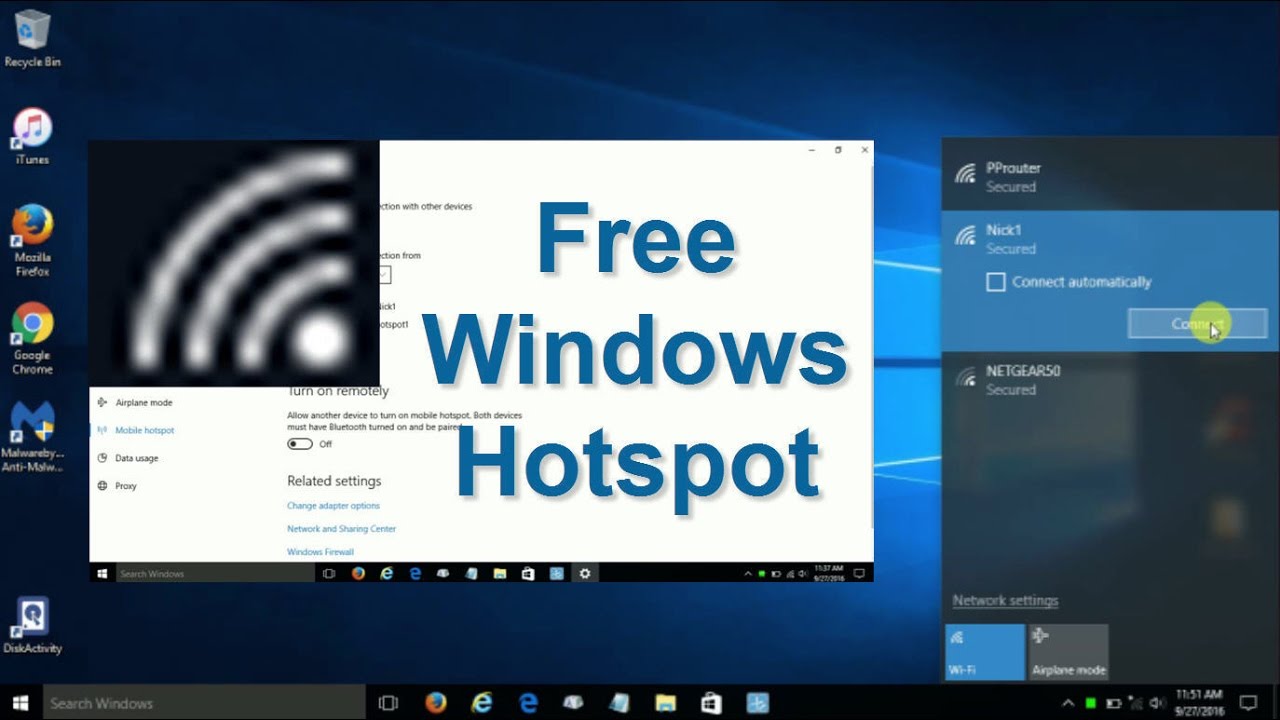
Step 6: Tap or click the "Mobile hotspot" option. You'll find this in the left menu. This is only visible if you have the Anniversary Update installed and you have a wireless internet adapter (all laptops should).
Step 7: Tap or click "Edit" to change your hotspot settings. You can change the default name and password to whatever you'd like. The name will appear on your other devices in the "Available Networks" menu, and the password will be required to connect. It's important to have a strong password, especially if you are in a public area.
Step8: Choose which network connection you want to share. If your laptop is currently connected to the internet via Wi-Fi, select "Wi-Fi." If it's connected to the network via Ethernet, select "Ethernet" from the menu.
Step 9: Toggle the "Mobile hotspot" slider on. This will enable the hotspot and allow up to eight other devices connect to your laptop and access the internet. The devices will not have access to the files on your laptop.
Step10: Connect your other devices to the hotspot. Once the hotspot is active, any device that supports Wi-Fi can connect to it. You'll connect to it just like you would any other wireless network. The name will be the name you entered previously.
You can see how many devices are connected to your hotspot from the "Mobile hotspot" menu in the Settings.
Method Two : Using macOS Edit
12 Steps To Create a Free Virtual Wifi Hotspot on Your Laptop Using macOS Edit
Step 1: Connect your Mac computer to the network via Ethernet. The only way to turn your Mac into a wireless hotspot is to connect it to the network via Ethernet.
You cannot create a wireless network if you're using your wireless adapter to connect. If your Mac does not have an Ethernet adapter, you'll need to use a USB Ethernet dongle.
Step 2: Click the Apple menu. You'll find this in the upper-left corner of the screen.
Step 3: Click "System Preferences."
Step 4: Click the Sharing option.This is at the end of the third section in the System Preferences window. If System Preferences does not open to the main screen, click the "Show All" button at the top of the window. This button has 12 small dots.
Step 5: Highlight the "Internet Sharing" option. The "Internet Sharing" option can be found towards the bottom of the list of "Services" on the left side of the window. Don't check the box yet, just highlight the "Internet Sharing" menu option.
Step 6: Click the "Share your connection from" menu. This will display the different network connections on your Mac.
Step 7: Click "Ethernet" in the menu. This will set Internet Sharing to share your Ethernet connection with other devices. "Ethernet" may have a slightly different name depending on your Mac model.
"Ethernet" will not appear if you don't have an Ethernet cable connected to your computer. You cannot wirelessly share a wireless connection.
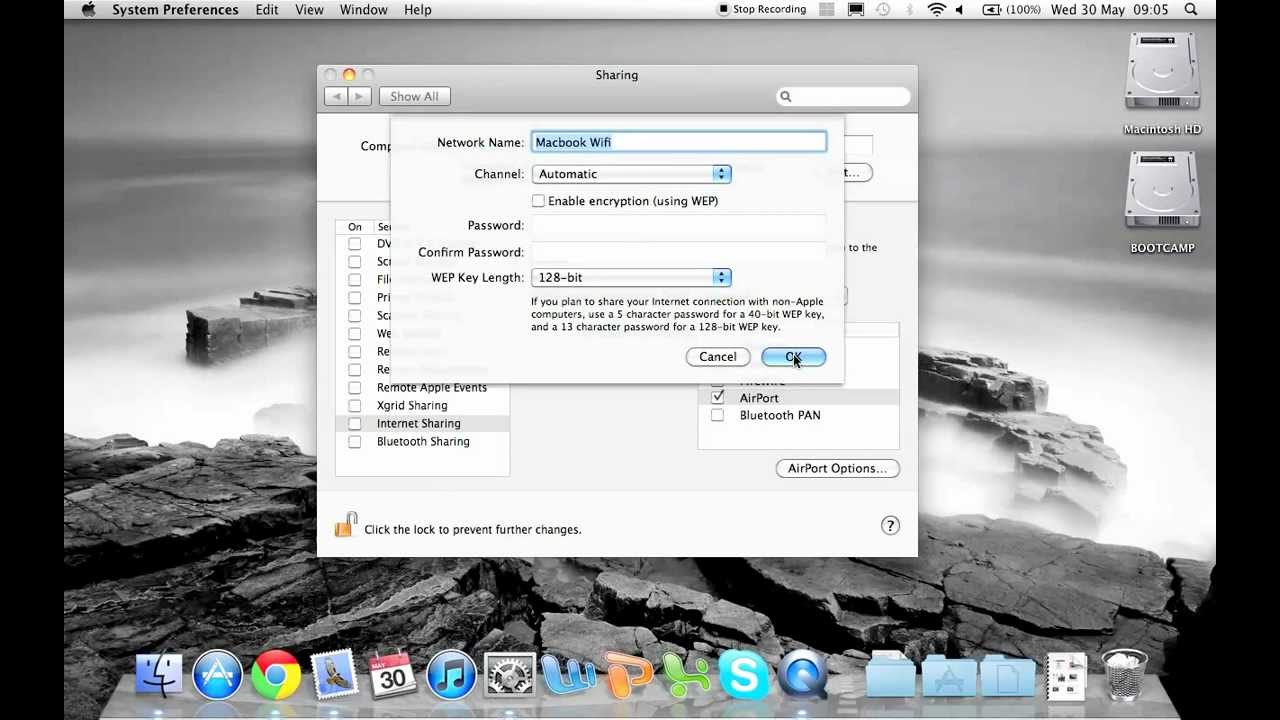
Step 8: Check "Wi-Fi" in the "To computer using" list. This will enable other devices to connect to your hotspot via Wi-Fi.
Step 9: Click the "Wi-Fi Options" button. This will allow you to change your hotspot settings.
Step 10:'Set your wireless network name and password. This information will be required when other devices attempt to connect.
Step 11: Check the box next to "Internet Sharing." This will turn on your Mac's new wireless hotspot, allowing other devices to connect to it.
Step 12: Connect your other devices. Once your wireless hotspot is active, you can connect to it from your other devices. Your new network will appear in the list of available networks on nearby devices, and the password you created will grant access to the internet. The other devices will not be able to access the files on your computer.
Method Three : Using Windows 7 and 8 Edit
12 Steps Create a Free Virtual Wifi Hotspot on Your Laptop Using Windows 7 and 8 Edit

Step 1: Visit virtualrouter.codeplex.com in your browser. Virtual Router is a free, open-source program that will turn your laptop's wireless network card into a wireless hotspot.
You don't even need a separate network connection in order to share it. Avoid a program called Virtual Router Plus. This program is riddled with adware and can compromise your system. Only download Virtual Router from virtualrouter.codeplex.com. Virtual Router does not work with Windows 10.
Step 2: Click the "download" button. The installer for Virtual Router will begin downloading. The download should only take a few minutes at the most.
Step 3: Double-click the installer. After downloading the program, run it to begin installing Virtual Router. You can find it in your Downloads folder or in your browser's Downloads section.
Step 4: Follow the prompts to install Virtual Router. You can leave the settings at their defaults.
Step 5: Click the Start button. You can launch Virtual Router from the Start menu after installing.
Step 6: Click "Virtual Router Manager." You'll find this program in your Start menu after installing Virtual Router.
Step 7: Enter a network name. You can change the network name to anything you'd like. This is the name that will appear on other devices in the list of available networks.
Step 8: Create a password. This will help protect your network from unwanted connections. Users on other devices will need to enter this password in order to connect to the network.
Step 9: Click the "Shared Connection" menu. This will display your available network connections.
Step 10: Select your active network connection. Select whichever connection your laptop is receiving internet from in the "Shared Connection" menu. This will ensure that connected devices can access your internet connection.
Step 11: Click "Start Virtual Router." This will start your new wireless hotspot, allowing other devices to connect to it.
Step 12:Connect other devices to your new network. Other wireless-capable devices will see your new hotspot in the list of available networks. Select the network and enter the password you created a few steps back. This will allow the device to connect to your computer and access the shared internet connection. Connected devices will not be able to see your computer's files.
Troubleshoot problems with Virtual Router. Since Virtual Router isn't an official program, there are several things that may be causing it to not work for you.
Try rebooting your computer, especially if you haven't rebooted since installed Virtual Router. Make sure you have the latest available drivers for your laptop's wireless adapter. Find and Update Drivers for detailed instructions. If you get the "group or resource is not in the correct state to perform the requested operation" error, download and install the hotfix from Microsoft. Make sure you're not using Windows XP, Vista, or 10. Virtual Router only reliably works on Windows 7 and 8. Windows 7 Starter is not supported.
4 Ways to protect your computer against keyloggers
Related:
Read Also:

Comments
Post a Comment
Thank you for reading.
Please comment or ask a question regarding to this post